Tuesday, July 30, 2013

Clowndust

Hooray, most of the books are dusted and most of the furniture is in. Managed to put a gouge in the floor when putting in the couch. I'll be patching it in the next few days, hopefully no others happen soon.
 
It's starting to look like a real room again! A real crazy room, but still. I'm too tired to write any more, here's the pic: 


Monday, July 29, 2013

Banana Peels and Rat Kings

Officially, the poly on the floor is not fully cured until tomorrow. But, on Wednesday, the claims inspector is coming about the sewage spill, so I'm trying to have the furniture moved in by then to free up some space to move in the hallway downstairs. Currently all my tools, paints, sandpapers, a couch bed, and a bunch of books are taking up most of the hall.


So I decided to take down the dropcloths today instead of waiting til tomorrow. In pulling out the staples and generating a rat-king worth of duct tape, I also made an exciting discovery. It seems the clowns have generously decided to curse the floor with some sort of banana peel magic. It's freaking slippery. So far, I've fallen twice while doing stuff in there, gaining some lovely bruises in the process. I'm becoming worried that as my friend Susan suggested, the cat hair was acting as subtle anti-slippage texturing. I may have to consider using a different type of paint or finish when I do the hallway. I hate bananas.

Taking down the dropcloths also generated approximately an Oklahoma worth of dust, some of which made its way under the cloths.
 
 
For now there are two air filters in there working overtime. Tomorrow will be brought to me by the letter "Swiffer," as I take stuff off shelves and dust. The moldings and the clown closet still need doing, and I may wind up painting or staining the shelves to match, but overall I think it's looking cool.


Friday, July 26, 2013

Regularly scheduled programming

In the last two days since The Poopstorm of 2013 and The Great Disinfection, I've been sanding down the finish with a super-fine sanding cloth, and wiping up with tack cloth trying to get as much hair out as I can. Then I follow with a coat of the poly. Its working, in that there is slightly less hair in between when I sand and put on the poly, but the poly seems to drag more hair into it no matter what I do. I'm making peace with the fact that there will be some hair in the finish no matter what I do. Hopefully no one looks too closely at it.

I've been doing this in my underwear mostly, because every piece of clothing I have is covered in cat hair or sewage water. (The perils of having three fuzzy cats for roommates.) Today, my neighbor made the mistake of trying to peer through the tiny hole in my window from his garden path while I was working on the floor. I rest assured that he has learned a painful, but important lesson about the perils of nosiness.

I'm not terribly happy with the poly, it's yellowing really fast. I thought I had gotten a non-yellowing poly, but its turning my pink an annoying peachy color. I'm not sure if I'll use the same brand if I do the rest of the house. After the water damage, it seems I will be doing the downstairs hallway at the very least. What I will do on the rest of the house, is indulge my inner goth. Darker colors will mean the cat hair in the finish won't show up so much. No more of this white-based crap. It's all going to be dark enough to make my mother frown.

No pictures of the floor today, I'm going to wait until its finished in a few days to post the final pics. Right now just one more coat of poly and then I'm going to let it all cure for three days before moving in the furniture. Instead, here is a picture of the Roots Of Unusual Size that the nice man from Roto-Rooter pulled out of the sewer pipe.

 
 My plan for preventing this all from happening again involves seeding the sewer with pearl-clad alligators to eat the R.O.U.S.

Wednesday, July 24, 2013

Roots

On the eve of my triumph, disaster has struck. Apparently some malevolent higher power decided that I was not serious about moving on to the other floors yet, and decided to force my hand.

Yesterday, at about 2pm, the downstairs toilet started overflowing. With sewage. I called the city, because it was happening even when the water was off, and they sent out some guys to check our main sewer line, which turned out to be clear. They showed us some pictures of near our drain and said they think it might be blocked with roots. Our neighbor was having the same problem, so we were hoping it was the city line, and not a side line. Turns out that our side line and the neighbor's are one and the same.

Roto-Rooter wound up coming out at about 9pm and taking out a whole mess of tree roots. They think that's what caused the blockage, and since both we and our neighbor were doing laundry at the time, anything that went into our sewer line came back up through our toilet and his bathtub.

We spent many hours yesterday bailing out the bathroom using every towel in the house and Stanley the Shop-Vac. When the plumber left, we made the belated discovery that the overflow had also come up the laundry drain in the garage, so we had some additional sopping up to do.

I will spare you the pictures of the overflow, because most of it was extremely raw sewage and it was groooooss. The "water" was about an inch deep at its highest. I am not sure we will ever be clean. We had to go to a friend's house last night just to shower, because the plumber put herbicide into the pipe that had to sit dry for 6-8 hours.

Today, the disinfecting begins. Everything in the bathroom and garage are getting a coat of bleach water followed with a Lysol chaser. Some of the water made it out of the bathroom, and into the hallway carpet. It's soaked all the way to the floor, so I decided to pull it up and plan on painting that floor next, even though it presents certain cat-related logistical challenges.


The floor was so wet that the drywall gunk on it scraped right up, and I was able to wipe most of it off. Looks like I need to pick out some new paint and patterns. What goes with "poopstain"?

 
Right now, we're not sure if there is still water under the bathroom cabinets, and the only way to find out is to pull out the sink, plumbing and cabinet. I'm going to give it a day or two and see how things look before we embark on that, but I've got nightmares of disgusting poop-mold creatures growing under there. We may be breeding some kind of comic book nightmare monster. I'll call him Feclops. He is mighty, and he comes wielding his twin blades: Dysentery and Gastroenteritis. 


Monday, July 22, 2013

Unholy alliances

Oh, tack cloth.

I think back on the time, two days ago when I had never heard of you. The nice old clerk at the hardware store, who introduced us. I was taken in by your promise of super tuff-ness, the dreams of having a cat-hair free floor finish. I thought you would be like a young James Dean on steroids.


I'm not sure how your parents managed to mate. Clearly you are the product of an unholy liaison between a spider and some cheesecloth. And so sticky. so very very sticky.

 
You leave my hands so sticky it makes me want to scream. Not just like when I touch the side of my cocktail and get lemon-drop all over them, but like a toddler let loose in a maple syrup factory while double fisting pb&honey sandwiches. I hate you. I mean, sure, I love that you pick up the loose hair, dust, and sand from me sanding off the finish, but I can't get over the sticky-hand thing.
 
We're breaking up. it's not you, tack cloth. It's me.  Its been hours since I touched you, and after five handwashings, I'm still sticky. Ok, maybe I'll use you for the final 2/3 of the floor. But I won't like it, and there may be violence. 

Saturday, July 20, 2013

Fish and Fuzz

First off, for people who asked about my parents underwater lair, here is a link to my dad's pictures. Hope you like fish!

Now that the touch ups have dried, I'm starting the sealant. I'm using Varathane Satin floor finish, using a special floor applicator that helps to keep it from getting bubbles. The applicator has a long broom-stick handle, so its more like mopping than painting. Varathane recommends four thin coats of the stuff.

I wiped down the floor using a broom, a duster, a dust mop, and a wet cloth first. Even so, the first coat is rife with cat hair. Since 2/3 of our cats are black, the hairs are very obvious and very gross. I'm totally unhappy with the way it looks. The purple hair you see there is mine. I'm going to have to paint over where it was, because it has stained the floor. (Punk-girl Problems!)

 
I talked with one of the guys at my friendly local hardware store, and he recommended sanding with a super fine sandpaper so that it takes off only the finish not the paint, then using tack cloth, which picks up dust and hair. I'm going to go over it by hand, and then apply the sealant without using the applicator's extender so that I can wipe up any hair as it appears. It's going to be labor-intensive, which bums me out because I thought I was almost done. I don't think i'm going to be happy with leaving it as-is though, because it'll constantly look like we need to vacuum.

No more treats for these cats until they stop shedding. I think my clothing is spreading hair into it too, so I think the next coat is going on clothing-optional. My mother will be so proud.

Thursday, July 18, 2013

Hi/Lo

You know you are living in a state of heightened technology, when your mother, who is 4000 miles away on a desert island, finds out you have the flu by reading your blog and emails you about it. This is especially significant because my mother hates technology ("it'll rot your brain") but has reportedly not let go of my dad's IPad since buying it for him for Christmas. I never thought I'd see the day.

Now that I'm recovering from the ick, I used a decidedly low-tech and inartistic solution to put the fancy lines on my cotton candy. It was also inspired by my mother. I've been putting off working on this part because I wasn't really sure how to do it, and didn't want it to look silly.

I laid my giant cotton candy stencil on the floor, and put some dressmaker's tracing paper underneath it. My mother, who learned to sew in the 60's, uses this to mark her patterns as she's cutting them out. It's been replaced with some newer techniques, so you're not likely to see it on Project Runway, but it's what I grew up with, so I use it too and happened to have some around. I didn't actually even know what it was technically called until I looked it up to link it. You can see the paper below on the cone, it's kinda like carbon paper, but a little chalkier and it wipes up with a little water

I traced (poorly) all the lines so that I could get the placement right. The thing I wasn't happy with when I was free handing was my bad angles and placement. My eye just isn't good enough to freehand that stuff. On the other hand, I am fantastic at painting by numbers.


Here's what it looked like when I was done. The lines are a little washed out in the photo, but they were pretty dark in person. They're also upside down, because blogger doesn't recognize it when I flip my pictures. 


I also used it to go back over the cone to figure out where I messed up those lines. One was so bad that I sanded it off, I'm going to touch it up with black and white. But the important thing here, is that one was ALMOST right!! Hooray. 
 
I filled in the lines I traced with black paint, more or less. It looks so much better than my freehand attempts, which looked a lot like someone puked a Rorschach test on the floor.   I am pretty sure most of my more-artistic friends will laugh at me for doing it this way, but they had their chance at tacos and immortality. I am so pleased with the way my copied lines came out that you get two pictures


I also cleaned up some of the junky bits where I dropped my brush, and parts of the circle. I'm trying to figure out if I want a border around the circle, but I think I may just clean up the edges and leave it. One more session of touch ups and I'll be ready to wipe it all down and seal it. Thank god! I'm about a week over the time I'd budgeted for doing this, which all things considered isn't that bad.

Monday, July 15, 2013

I don't like Mondays.

Not much to report today, other than the fact that this flu is still kicking my rump... and lungs. I tried to work on cleaning the lines up and adding some more black today. The first coat dried a little more purple than I liked, but I think the second coat will fix that.

I tried to do some of the lines going across that help give it a little bit of depth, but they looked so embarrassingly horrible that I didn't even take a picture of them, I just wiped them up. I think once this coat dries, I may try to trace them or make some kind of transfer. If anyone wants to volunteer to come do them, I am willing to raise my price to tacos AND beer.

It looks pretty much the same today, but I managed to get a picture of it right side up, hooray.

Friday, July 12, 2013

New Black City

I did a second coat of the pink last night, mixing the porch paint (lighter pink) with the interior paint (bright pink). It didn't explode, so I think it will do OK. I intentionally didn't mix it much so that I could get some stripes of the darker color mixed in. I call the color Princess Fluffypants Pink, and I mixed it myself, yo.

 
I also noticed that at this angle, it kinda looks like a unicorn version of Meatwad. Maybe they can date or something.
 
This morning I started on the black outline, using Valspar Interior Satin in New Black. I picked this black from the kertrillion blacks they have sort of at random because I was in a hurry and the name made me laugh, but I was pleased to find after I got the sample mixed that it's in a magenta base. It looks a bit like one of Bruce Vilanch shirts from the old Hollywood squares, and it won't do anything to dissuade my friend James from calling this the LSD room.


No matter how much I shook and stirred it today, I couldn't get all of the magenta to mix in, so I'm going with it As Is.

It goes on looking black though, so that's a bonus. As a non-artist, My main goal with this cotton candy was for it to not look like something that would be featured on Regretsy. i'm not entirely sure I succeeded, I really don't like what I did with the cone in particular. I'm going to try to patch it up a bit on the second coat of black, and do the lines inside the cotton candy when the outside has dried. As you can see next to my foot, I managed to drop a brush onto the previously mostly-finished pink section, so now I have to fix that as well.


Thursday, July 11, 2013

Productiviwhat!

I am a horrible artist, as anyone who has played Draw Something! with me can attest. I come from a long line of individuals who have not artistically matured past cave painters. If I was to try to draw on the floor, the whole thing would look something like this:


That might actually be my best drawing ever, because you can ALMOST tell what it is. Needless to say, it won't work for the floor. Now that my hired help has fallen through, I am looking at alternatives to get the design down.


I've blown up the cotton candy on my computer by about a zillion percent and printed it out across multiple pages. I wasn't really sure what size I wanted it to be, so I tried it at some different scales. I finally settled on one that was sort of in the middle.


Then I trimmed it and taped the whole mess together:


I decided to try to cut it out so that I can trace around the outline for the first layer of pink, so now I have a huge piece of cotton candy. It looks tasty, and I wish I could just stick it to the floor and paint over it, but somehow I think that might be a bad idea.


Some of you have offered suggestions, the best being to use an overhead projector to display it on the floor and trace it. I don't have the equipment for that, so I'm going to try to use the marking paper my mother taught me to use to mark patterns. I'm not sure how well this will work, but I am sure that it'll wipe up easily if I mess it up too badly. I will have to transfer the pattern in layers, as the black outline will be going on over the pink of the cotton candy.
 
 
I managed the first layer of pink. I tried to keep the brush strokes cottoncandyesque, but I didn't exactly go to the Sorbonne. (Well ok, but I didn't go to the part of it where they teach you how to MAKE art. Besides, I think ceilings and floors are more of an Italian thing...) For the cotton candy I'm using Valspar Interior Paint in Pink Burst. I picked up a sample of it for less than $3 and it should be more than enough to finish the cotton candy. I am hoping it holds up underneath the floor sealant, even though its not porch paint. I may be doing more cotton candy painting as the years go on.
 
 It is VERY high on the pink scale right now, but I plan to try to mix in some of the lighter pink for the next coat, hoping the darker undercoat will give it depth, but I'm sure that's what the cavemen thought when painting cotton candy on their walls too. It's slightly less neon than it looks in the photos, but only slightly.


The paper cone part is the same type of paint sample in Birchwood White.

I also managed to clean up most of the paint bleed using a fine brush, there weren't too many bad spots, with the majority being predictably near the clown closet and pee corner. Yes, that's my foot and its covered with paint.


Wednesday, July 10, 2013

detapeage

There was something immensely satisfying about pulling up the tape today, I'm not sure if that's because I'm seeing the design come together, or because I really like the feel of pulling off band-aids.

I had really low expectations for the Frog Tape, and figured on doing a lot of fixing, but it worked much better than I expected of a product that advertises during daytime TV.  There are only five or six spots where the paint bled through it, and that's was mostly because of poor application in the corners and letting the tape run up the bookcase in a few spots. I think it should be relatively easy to spot-fix with a fine brush. I left the tape in the center so that I can find the center of the circle more easily and without mathing when I go to paint the cotton candy design.

 
Overall, the lines came out really crisply and I like the way they look. Here's a close-up:


You can see in the closeup one of the many fuzz-bumps generated by random crap getting onto the floor and into the paint. I have more extra paint that I expected, so I may go back and try to sand some of these down before putting on the sealer.
 
The next step is to tackle the cotton candy design. I had offered a friend tacos in exchange for drawing it, but he's busy this week, so I am going to have to try to figure out how to transfer it. My drawling talent maxes out somewhere between straight line and stick figure. If anyone knows a seattle-area artist willing to work for tacos, let me know. 
 

Tuesday, July 9, 2013

Second coat, whee.

I spent the last two days putting the second coat on the pink and blue. It looks like its going to need a third coat to keep the grey from bleeding through. I thought it might be a cool effect, to look olde fashionede but i'm not in love with it now.

Tomorrow I'm going to use a small foam roller to put on the third coat. I should just barely have enough paint for a third coat and then a few touch ups. Right now, I'm having issues with dust and gunk getting in the paint, through a combination of tracking them into the room and from the carpet along the edges. I think i'll wind up with a few random lumps and catches, if the poly doesn't manage to level them out somehow.

If I was doing this again, I'd make sure the hallway going into this room wasn't full of the contents of the room and could be vacuumed every day to keep down the stuff blowing in from that direction. Some of the gunk is also coming from my face, since I managed to catch a cold at some point in the last week. There is nothing as fun as a summertime cold, and I am tired of spitting up more green junk than Linda Blair. Hopefully it is not the Clown's revenge for changing their room.

Sunday, July 7, 2013

Blooooo

Afternoon update!

The pink is looking pinkier now that it's dried for a few hours. I added the first coat of blue (Valspar Porch Paint in Surf Spray).

 
Hopefully it will get slightly blooier too. I think I am going to take the frog tape up tomorrow before the second coat so i can fix any of the lines that didn't come out crisp.


Tapeworms

Ok maybe just Tape. Today we're working on the design. I'm using a design from some target packaging as inspiration.


I'm changing up the colours a bit and it won't have any of the text, though I do appreciate the sentiment of "can't get enough sugar on a stick." When we picked up the paint, the lady at the register asked if we were painting a nursery, which wouldn't have been as funny if I hadn't said "I hope no one thinks we're painting a nusery" two minutes earlier. Stupid babies and their stupid pastel-liking. She also told us the room would be good for twins after I told her that I was painting a circus room. I like to think she meant the Siamese variety. (For shopping list: conjoined Siamese cats.)

I'm using Frog Tape, which I've never used before, mostly because Pharaoh suggested it after seeing advertisements on some of his favourite daytime TV shows. Taping out the design was harder than we expected because of the way the book cases throw off the squaritude of the room, and also maths.


We wound up eyeballing a lot of it, and it's not going to be perfect, but I think that's ok in a cotton-candy design. Plus I can always cover it up with a zebra-striped rug.

I put down the first coat of pink (Valspar satin porch paint in Prom Pink). The pink isn't as PINK!!! as I'd like it to be, but it definitely feels like cotton candy.


Once the pink has dried for 6 hours and i can walk on it, I'll put down the first coat of blue. In the meantime, we have kinda a modified rising-sun thing going on. 

Paint Drying


I had every intention of posting some cat pictures on Friday, but it turns out that posting and holiday weekends are two great tastes that taste kinda crappy together.


While I waited for the paint to dry yesterday, we went on a road trip to go swimming in a lake, so here’s some pictures of that instead. 


Wednesday, July 3, 2013

Other Pursuits


My friend (and better blogger) Jeff asked if I was going to continuously remodel my house just so that I’d have stuff to blog about. I think the number of projects in this place is probably never-ending, which I am afraid makes me Old Lady Winchester. I expect Indian Clowns to come out of the trap door any minute now, as construction has ceased for three days. (Side note: I was terrified of the Winchester Mansion as a child, and my parents frequently used it to scare me into doing whatever it was they wanted me to do ("Eat your zucchini or you'll go to the Winchester Mansion...") I am pretty sure it was my 6-year-old brain's version of hell. Yes, I was scared of a house.)

After a few touch-ups this morning, the paint is happily drying on its own. I can't tape it up for the design for another 72 hours, so I don’t have much to write about today. Instead it’s time to get into the wayback machine and head to a month ago when I made this pot rack.
 

It’s made out of a brushed-nickel closet rod that I cut to size, and some Ikea S-hooks. My neighbor caught me outside using a hacksaw to cut it down, and I am pretty sure he thinks I was making a stripper pole for dwarves.  I told Science-Doctor Dad that, and he pointed out that it wasn’t thick enough to be a stripper pole. He is sure of this, because my mother has been taking pole-dancing lessons and wants one put into her house. It’s so nice to have normal parents.
I'll post some other mini-projects I've done lately over the next few days.

Tuesday, July 2, 2013

Holes


So last night I took a look at the floor, and the paint has brought out every crack and dimple. I thought I was resigned to this, but it turns out I wasn’t quite ready to be done.  (Current Score: Floor: 1, Me: 1).

I had the bright idea to try to patch them up... I sanded down some of the holes with 80 grit and tried to fill them with Bondo. Most of them turned out ok, I still missed a bunch because the Bondo dried so fast and I didn’t want to mix up more. After the last Bondoing, I had forgotten to clean my putty knife, so it went on a bit gloopier this time. I think it may have been a terrible idea.

I think NOW I’m resigned to the ones that are left. They won’t matter too much with the pattern, and I kinda like the beat up look. But when I do other rooms, I’m going to be using more of the troweled wood filler and Bondoing like the wind. The smell is so bad that two of the cats are covering their noses.

I let the Bondo dry for a few hours, then went to sand it down. I used the electric sander, which turned out to be a horrible idea. The paint has been drying for a little less than 24 hours, but hasn’t fully cured yet. Sanding it led to the creation of tiny roly-poly bugs of latex, which proceeded to clog the sander. Between this and the extra gloopy-boondo,  I wound up sanding a lot of them using a sanding block, which faired a little better.
 

Once most of the holes were done, I went over the whole thing with a sanding block and 220 grit. Conventional wisdom is that you’re supposed to sand between coats so that any wood fibers that come to the surface get sanded down to smooth out your final finish.  I’m not sure if I believe this or if it’s just Sandpaper Company Propaganda, and with all the remaining dimples and bumps it probably won’t matter, but I’m trying it anyway.

Two shop-vac’ings later and a wipedown and there are still roly-poly bugs though, hopefully I can get them up with a broom and do a second coat later today.

Update:  Thanks to the combined efforts of my trusty broom Champ and Stanley the Shop-vac, I was able to perform a roly-poly extermination. Second coat completed! I might have to do three to cover my bad patching though, I’ll find out tomorrow. Once the final coat is done, I’ll have to wait three days for it to cure before I can put down the tape to tape out the design.  I also managed to step in the wet paint today.  I’m not especially surprised – it’s more of a shock that I didn’t do it yesterday.

Monday, July 1, 2013

Grey Elephants on Parade


It’s painting day, it’s painting day!!

Right now we’re having a heat wave (a tropical heatwave!). Ninety degrees makes it difficult for me to motivate myself to leave the wonderfully air conditioned bedroom and paint, but I dragged my sweaty rump up and out to attempt the first coat. The color is Elephant Grey by Valspar, and I’m using porch paint, which I’ve never used before.  This will be the base coat, I'll be adding other colors and designs on top once it's dried for three days. Yes, the name played a role in my choice of this color, Elephants are natural predators to clowns.

I dunno if it was the super smooth sanding, or the paint, but it went on super easily. Painting the whole room took less than an hour.
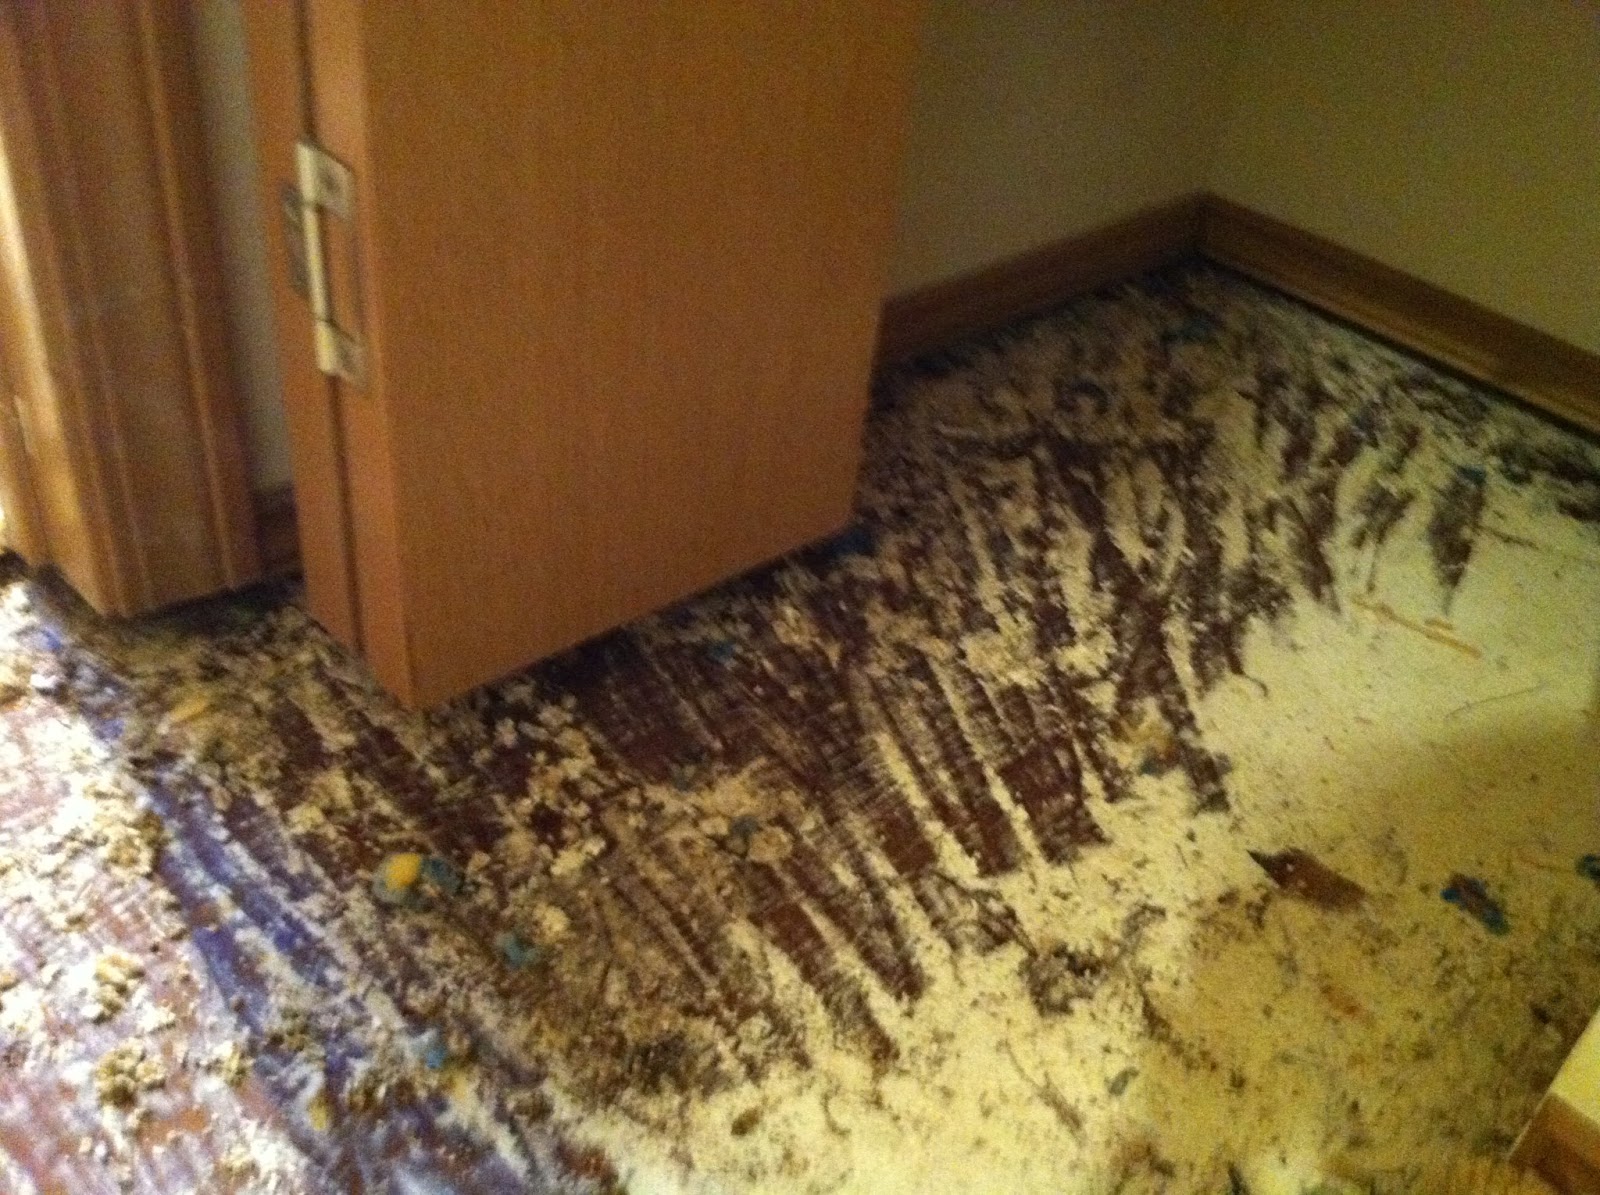
I started with the edges. This was a bit problematic because of the carpet still under the bookcases. It produced all sorts of fluff and dust when the brush came close, so I spent a lot of time wiping down both the brush and the floor. I think I got most of the fluff up. Pee corner was also a bit rough, as there was some junk under the molding moldings that Stanley (my new shop-vac) and I had missed. I sort of wish we'd done the molding around the edges to block off the carpet first, but my parents are currently at their undersea lair, and I'm not yet wise in the ways of mitering. Also I hate molding.

 
I finished off with a roller, and now just have to wait for tomorrow for the second coat. You can see that the edges are already starting to dry thanks to the heat, so the color will be a bit darker when dry. That bright blue spot on the floor is actually the tiny spot of sunlight coming into that room from between the tarps. It'll look less submariney when its finshed, I promise. Unless you're a fan of Operation: Petticoat, in which case it'll look a lot like a submarine at the circus.
 
 
Hooray! Current score: Ugly-ass Floors:0, Me:1.

To Bondo

Dear Bondo,

I am sorry I mocked your strange two-part ways.  Please forgive me for making fun of your hellish stenchiness. I have seen the error of my ways, for you have filled the holes in my floor with the type of wild abandon that makes me glad we are Just Friends.  You may be hell’s silly putty, but you make the nail holes part of the floor, and sand smooth as an old man’s head. Next time, you will be my go-to for the holes.

All that remains is for your dust (and stink) to settle, then I can Begin The Painting.

Sincerely,

TVV

White Sauce

So... I've been lazy about posting this weekend because of the heat, but I did actually write posts. So today there are three... Hooray!


The process of filling and sanding is a lot like making Edward Gorey’s white sauce. I putty, then I sand, then I putty, then I sand, then I putty, ad infinitum it seems.  Every time I sand, I find another divot or nail hole that I missed on the previous rounds, which means yet another fill. Yesterday, I thought I’d be painting today, but after the vac/sweep/wipedown, I found approximately three kerjillion new holes that needed filling.

I’m almost out of the wood filler. The sections where I troweled it all over definitely seem to have faired better than the spot patches (curse you, Directions! You win this round, but I’ll be back!). It works well for general smoothing on the floor, but not so great for filling the holes.  I decided today to switch to Bondo and see if that does any better on the small holes.

For those of you who have never worked with Bondo (I hadn’t), it’s a lot like silly putty on steroids. Except that it smells like a demon. I mean really, really bad. I can smell it from the kitchen, which is a floor away, with the doors closed.
Bondo is a two-step process, you mix this crazy red hardening cream with the goo...

 ...and once you’ve got it mixed you have about 2 nanoseconds to apply it. Working as fast as I could to fill in holes I had marked with a pencil for easy finding, it still took me two batches to get most of the floor, and I am pretty sure I missed some.

I’ll be sanding it down soon and we’ll see if it works any better.

In other news, the Shop-Vac gods heard my anguished cries and provided this badboy. The old, quadriplegic version has now been retired to the Garage of Misfit Toys. (Nobody wants a Shop-Vac without wheels!) 


If you think sanding is boring to read about, trust me, doing it is SOOOOO much worse.